About the application
Import From Excel app transfers data from an Excel spreadsheet to Bitrix24 CRM.
This application is suitable if you:
-
have a database of clients and deals in Excel or another external system and want to move to Bitrix24;
-
often upload data from external sources to your CRM;
-
are just getting used to Bitrix24 and want to “experiment” with the data import function.
Main features:
-
upload without a template - this application does not have any specific requirements for original files;
-
duplicate control - only unique records will reach the CRM and existing records will be updated;
-
the ability to rollback - cancel the last upload and the CRM will be returned to the initial state of the start of the upload.
-
automatic distribution of fields when loading data by matching names.
-
saving the distribution of fields between imports - when the document is reloading, the fields are distributed the same way as in the first loading.
How to work with the application
Step 1. Select and upload the Excel file
This application does not have a template, so you do not need to process the file beforehand. Save the client database to a local computer in .xls / .xlsx or .csv format and upload it into the application.
When the document is loaded for the first time, the data fields will be automatically distributed by matching names. Then, if it’s necessary, you can distribute the fields manually.

Step 2. Match the data from the file with the fields in your CRM
Select the entities that you want to create or update:
-
leads - customer data will be transferred to one CRM cards;
-
companies + contacts + deals - customer data will go to different cards: for example, information about the legal entity will go to the company, and the contact person data will go to contacts. In this case, the application will automatically link CRM entities that refer to one client. It is not necessary to create all three entities at the same time. Choose a combination based on your needs and the contents of your customer database.
Then match the data from the file with the fields in the CRM. The mapping table consists of three columns:
-
the column in the file - the names of the filled columns in the Excel table from the first row;
-
field in CRM - a drop-down list with the available fields;
-
sample data - content of a field to be uploaded.
For each column in the file, select a CRM field where the application will insert the corresponding data.

After completing the mapping, proceed to the next step.
Step 3. Load the data
By default, the application will automatically detect duplicates in the file and save only unique lines without checking for duplicates on the CRM side. You can change this before uploading, in this case the application will find matches by key fields in leads, deals, contacts and companies and update or supplement the data in these entities.
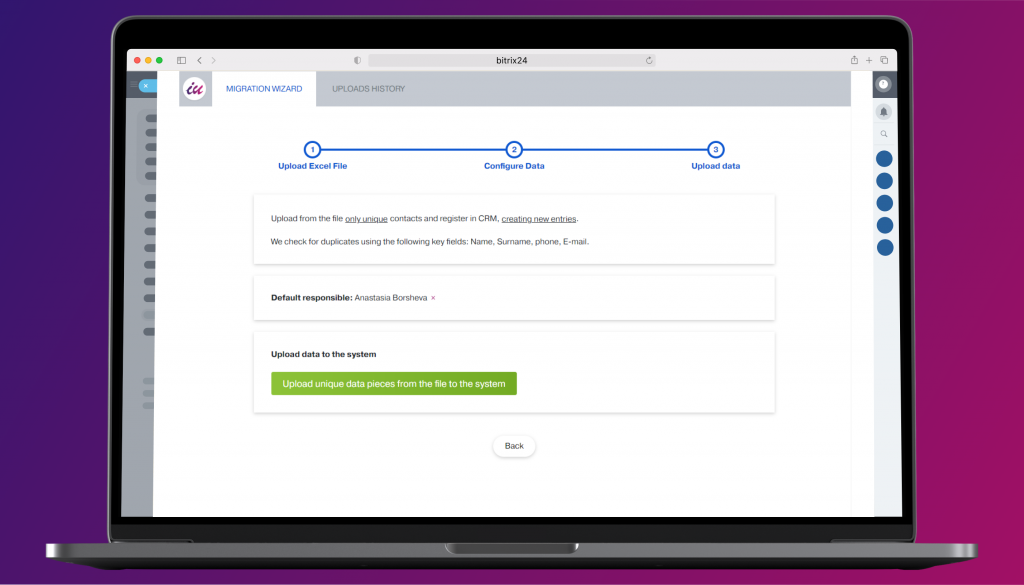
During loading, do not close or refresh the browser page, do not turn off the computer. The application will show how much time is left until the data processing is completed.
Check the data in CRM after upload
At the end of the process, check the uploaded data in the CRM. If necessary, you can undo the last import on the application page, and the CRM will return to a backup version of the start of the import. Do not close or refresh the page with the application while working with it, otherwise it will be impossible to cancel the download.

Information on previous imports is available on the “Upload history” tab.
FAQ (Frequently Asked Questions)
What to do if the distribution of Leads by sales funnels is set up immediately on your portal?
1. You can create a “directions” column with the funnel name for each lead in the imported file, and while importing, correlate it with a field in CRM.
2. Or select the default sales funnel on the 3rd step of import.
How to write the phone number extension in the same field with the main one?
Use the format: X-XXX-XXX-XX-XX #XXX, where the last three symbols are the extension number.
If you still have any questions, please write to us in the chat, and we will be happy to reply.