Formerly, sites creation belonged to professionals only. If you did not have the necessary skills and expertise, you had to spend a decent amount of time looking for a high-quality contractor and an equally decent amount of money for his services. Fortunately, these days are over.
Bitrix24 is not just a CRM or a means for managing a company, but also a simple and easy-to-use tool for websites creation.
The main advantage of creating a website using Bitrix24 is its direct tie to CRM. Insert a CRM-form, use a pre-built online chat and a callback form, and you won't lose a single client.
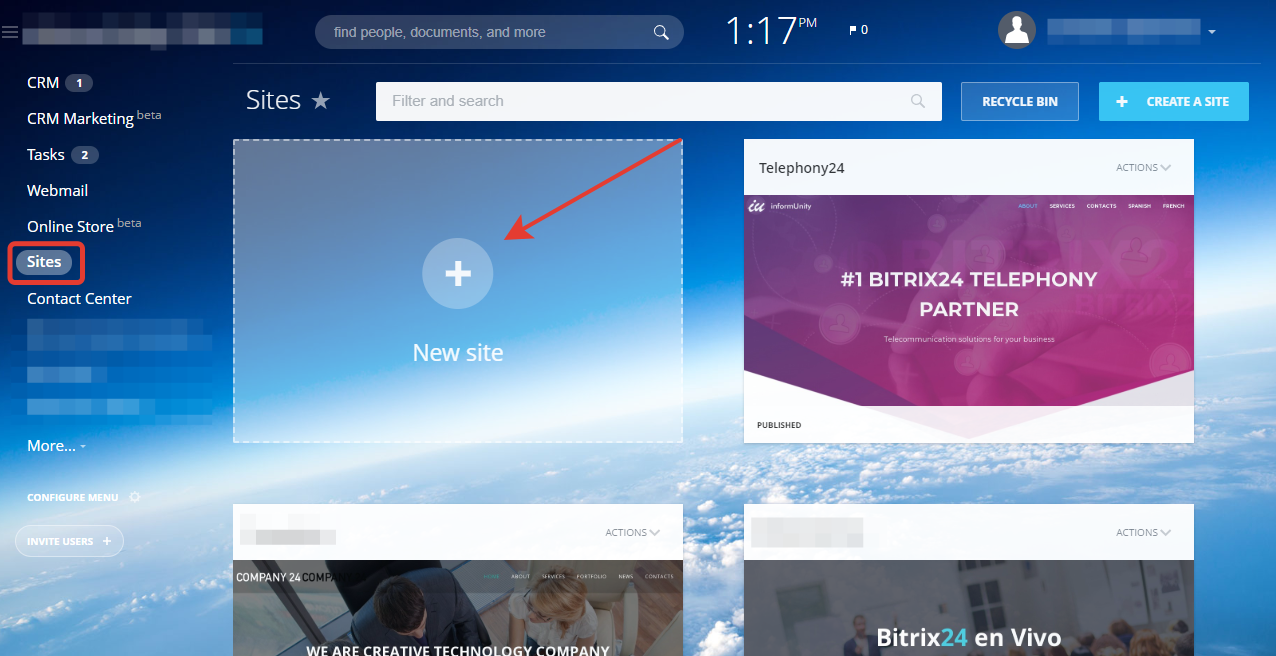
One of the key product features is its very simple and easy-to-use site designer. To create a site go to "Sites" at the left side menu and click the add icon. There you can see various preset templates. You can choose one of them in case you want to create a theme-based site or a site for a specific event, or you can create your own site from scratch. The only built-in thing is the online-chat icon.
Remember that even when choosing a particular template, you can modify it according to your needs: add or remove blocks, edit images, and so on.
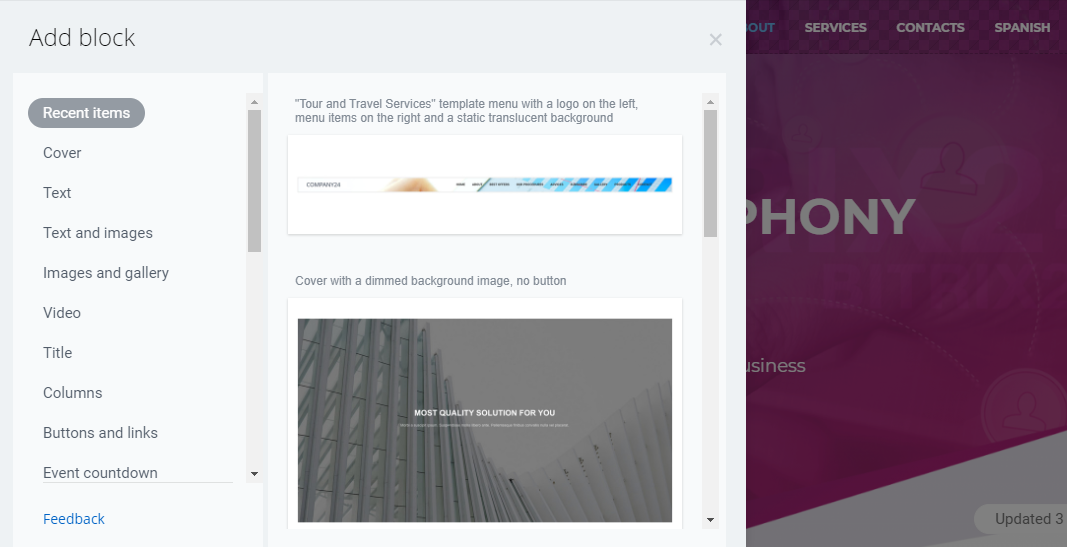
To add or remove a block, use the Add block option. All blocks are divided by categories thus it's quite easy to choose a proper item.
We suggest starting with the main site page and move from the top to the bottom. The first site page is its most important part, it's your face. Try changing the main image and the first block for starters and then get back to the header to incorporate it into the already existing page view.
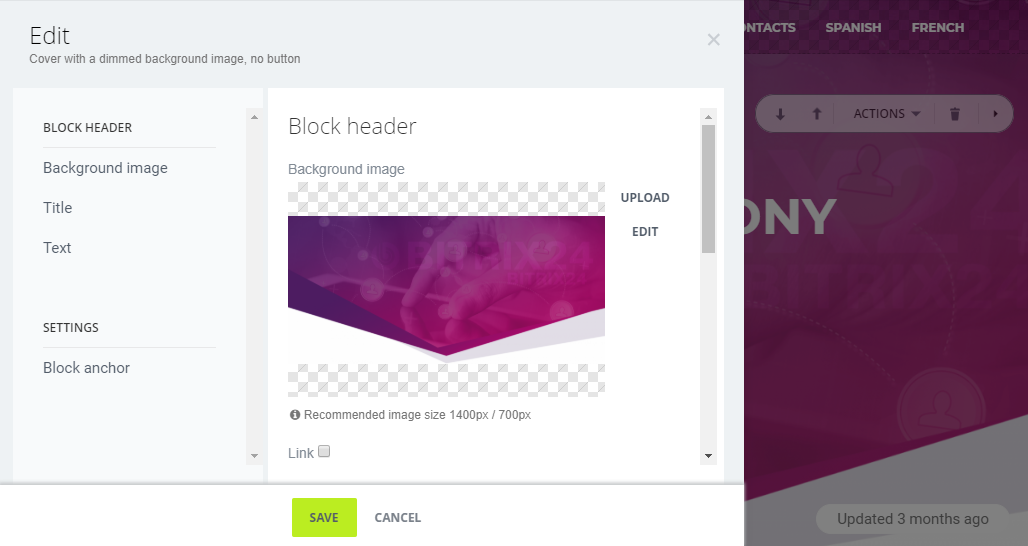
Choose a cover design by selecting Add block → Cover. At this stage, you can notice that the system offers you two options: Edit and Design. Using the Edit option, you can change the internal content of the block and assign it with some specific settings, while using the Design option, you can change the looks of the already set up blocks.

As you can see at the screenshot above, there's a small drop-down panel to your right, using which you can, for instance, hide, cut or copy a particular block.
Please note, that you can change the text itself and its layout by using the Edit tab (as shown in the screenshot below), or simply by clicking on the text field right at the site page.
Play with the blocks. You can make them animated or not, set an opaque monophonic background or add a background image, etc.
Remember that you can change almost all elements incorporated in the blocks, even icons from the image above:

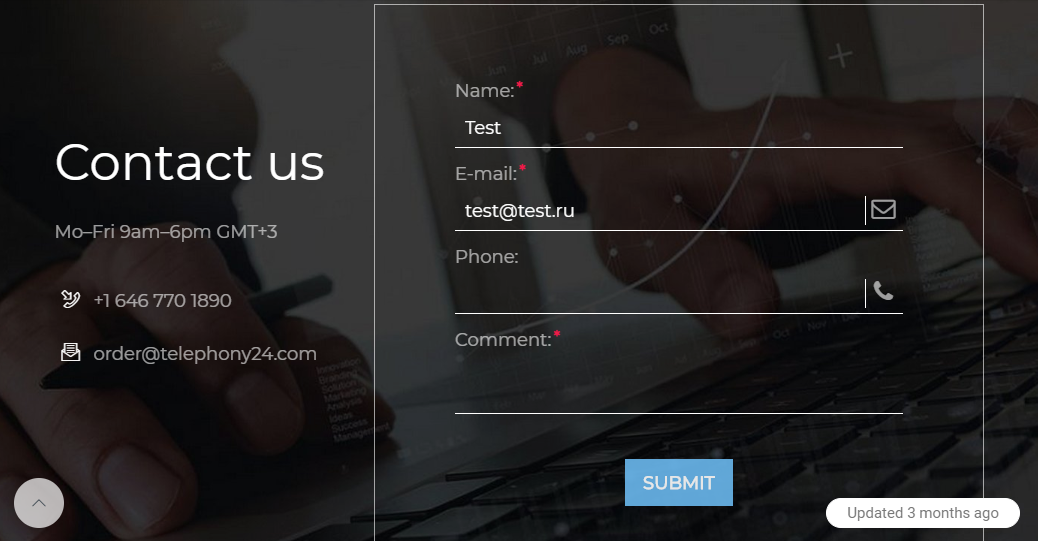
And of course, don't forget to place a CRM-form to your website so that your customers could conveniently contact you. To add a form to the site, click Add block and choose an appropriate template. All data received via the form automatically go straight to your CRM.
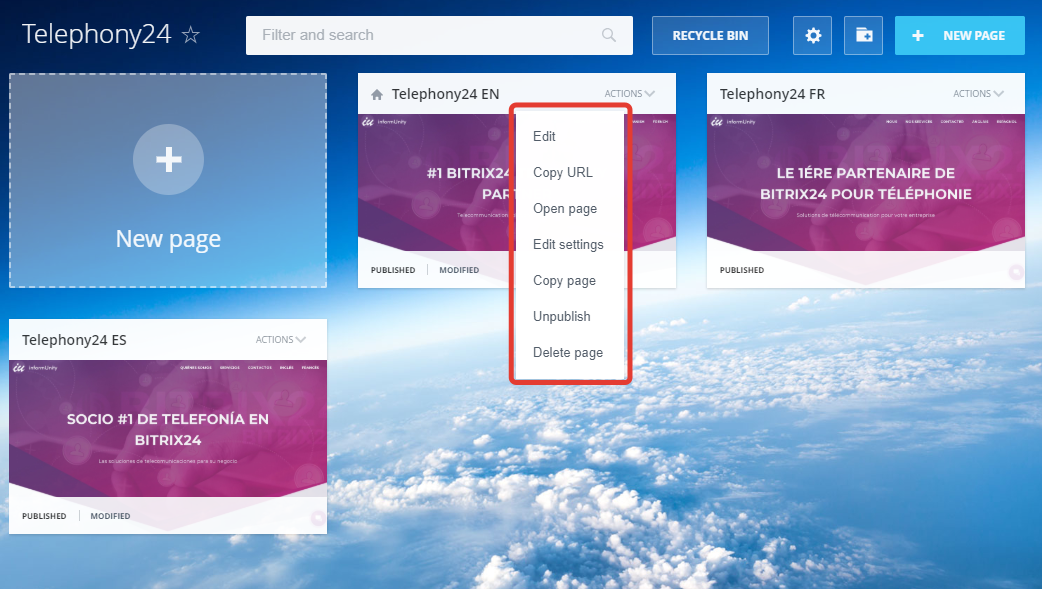
One of the key advantages of the Bitrix24 site designer is the fact that you can create several site pages and easily tie them with each other. It can be different language versions of the same page or a number of sub-pages in the same language. For example, if you sell tourist tours, you can create landing pages for each particular country.
If, as in our example, the content of the pages is almost the same and you want to duplicate the existing landing page, return to the folder where you created the first site page and choose Actions → Copy. As the result, you will see the exact same page that you can edit right away.
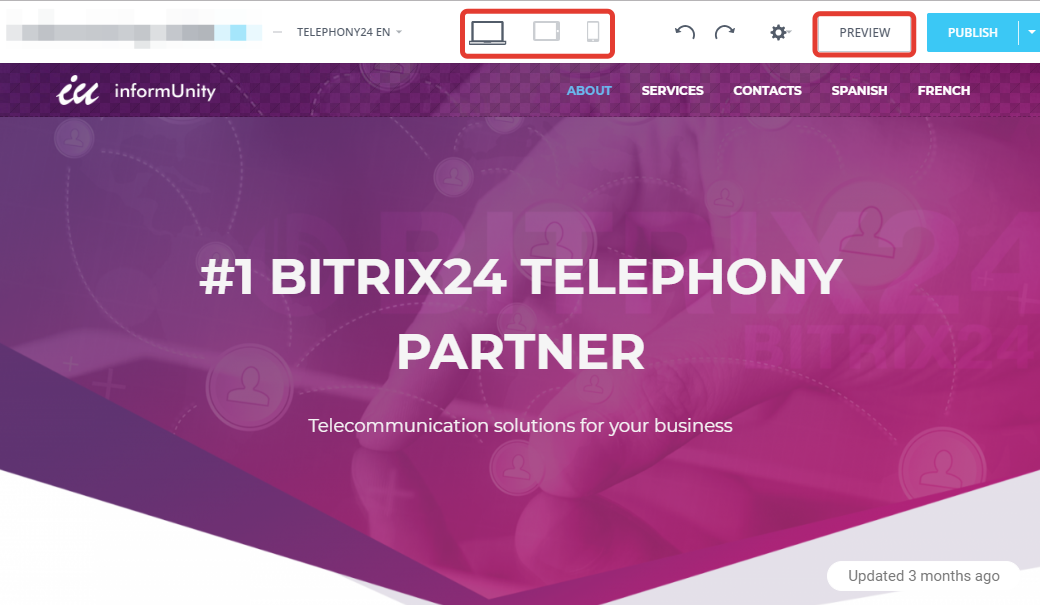
While editing, you can always check how the site looks not only on a PC or a laptop screen but also on a tablet or a smartphone. To see how the site is going to look like when published, click Preview.
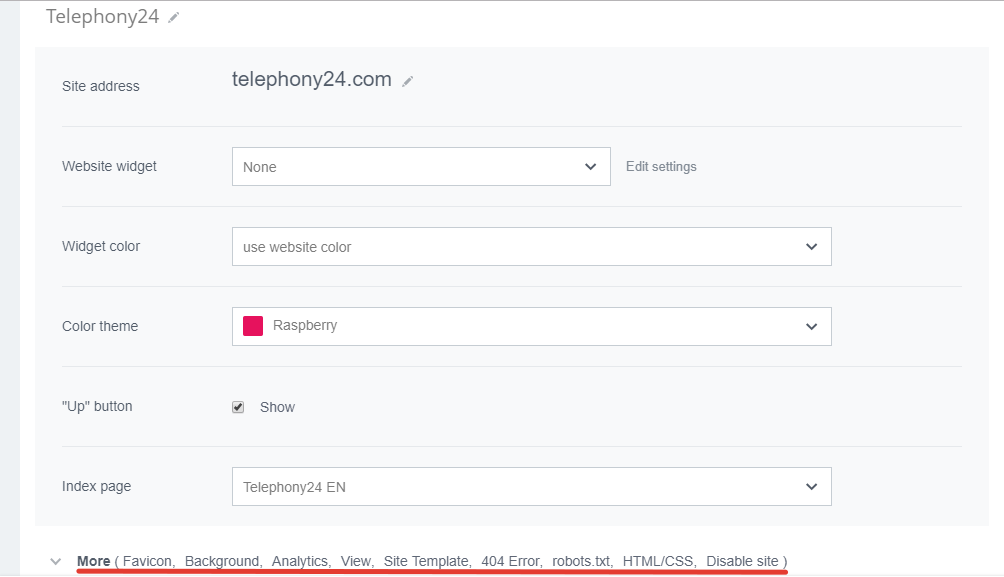
Before publishing your site, make sure to give it all the necessary settings. It can be done either from the main page of the site designer or from any chosen sub-page. Go to the top menu panel and select Settings. Site preferences are the settings that apply to the entire site, while Page preferences apply to each particular site page.
In the main section, you can set some basic settings and general site view, attach some analytic instruments and so on. One of the main perks here is that you can create the site using your existing domain. If you don't have a domain, you can always use the one that is offered by Bitrix24.
In page preferences, you can also set the layout and tags for social media and search engines, choose a background for your page, turn on analytics instruments, etc.

You can publish the site as soon as you are done with the design and settings of the pages. You can publish all pages at once or just one of them. As soon as you press Publish, everyone can see your site.

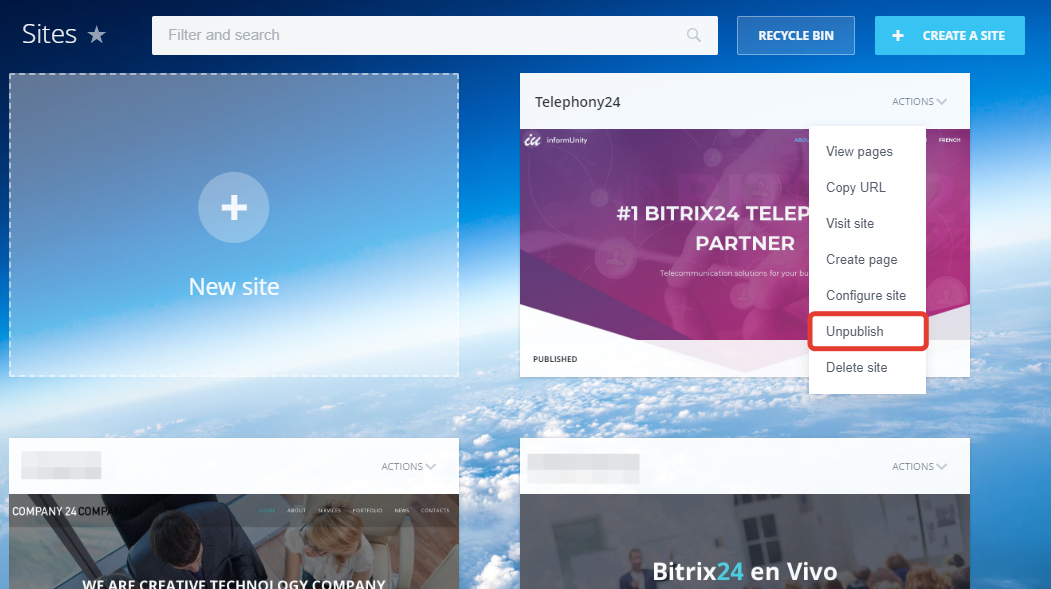
If for any reason the site has lost its relevance, you can keep it and unpublish an irrelevant page (or the whole site altogether). In this case, you can restore it at any moment.
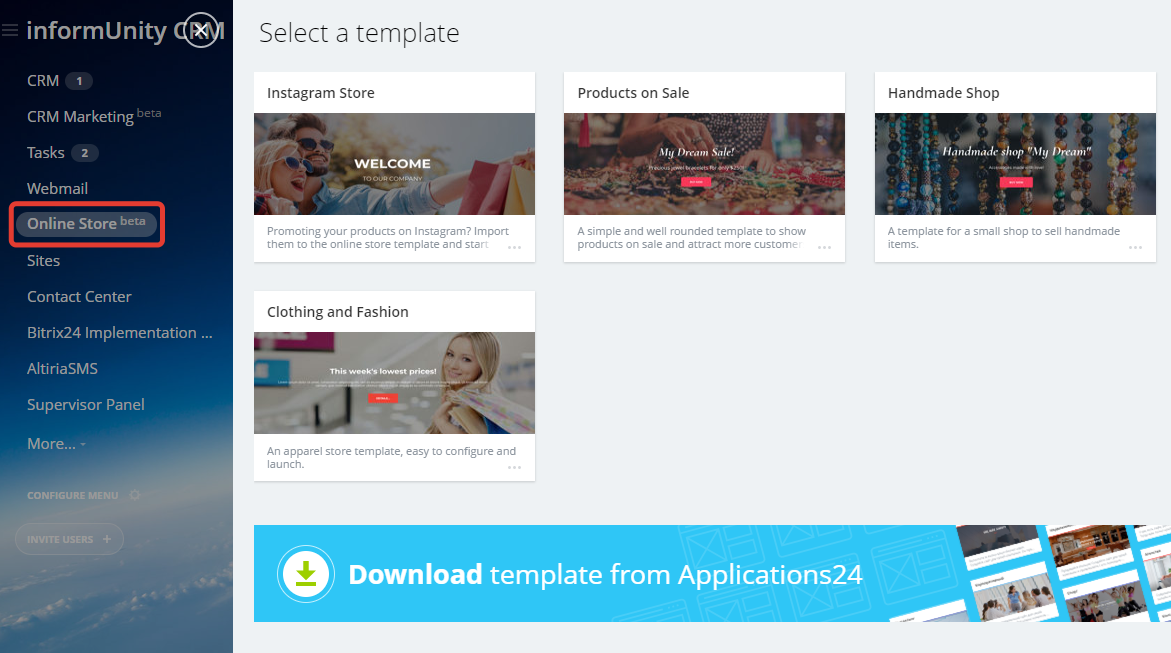
You can create your own online store following the exact same guideline. Similarly, you don't need to get a special hosting for your store, and it will be automatically tied with the CRM — no additional settings required. The main advantage of creating an online store with Bitrix24 instruments is that the entire chain of communication with the customers, as well as what happened to their orders, is stored in one place. It means that no order can get lost and that you will be able to track what brings you the most value.
Standard feature sets for Sites and Stores are available for all plans, but of course, they have certain limitations depending on a particular license. To see more detailed information about plans and features, go to the Market page of our site.
It's ok if you don't have Bitrix24 yet. Register your Bitrix24 for free and test all key product tools, including Sites and Stores.