Business sector
Retailers
Business goal
To set up a unified system for processing and shipping orders
Problem
Without integration, the workflow is scattered and takes a lot of manual work. Due to the human factor, the risks are high.
Tags: manual work, no automation, CRM, shipping
Solution
1. With an incoming call, Bitrix24 automatically creates a Lead. The operator converts it into a Deal and adds the products the client wants to purchase to the Deal card.
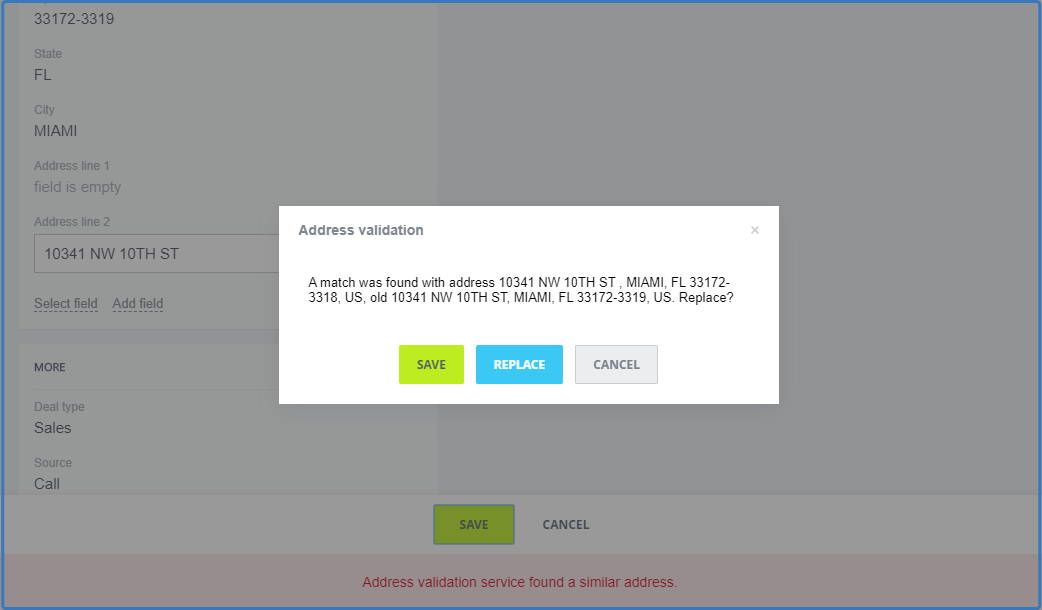
The operator enters the customer's data, including a given delivery address. All addresses that operators enter into the card are checked by the USPS and ShipEngine systems at all stages of the process. If an address is entered incorrectly, the operator gets an error notification and a hint with possible options.
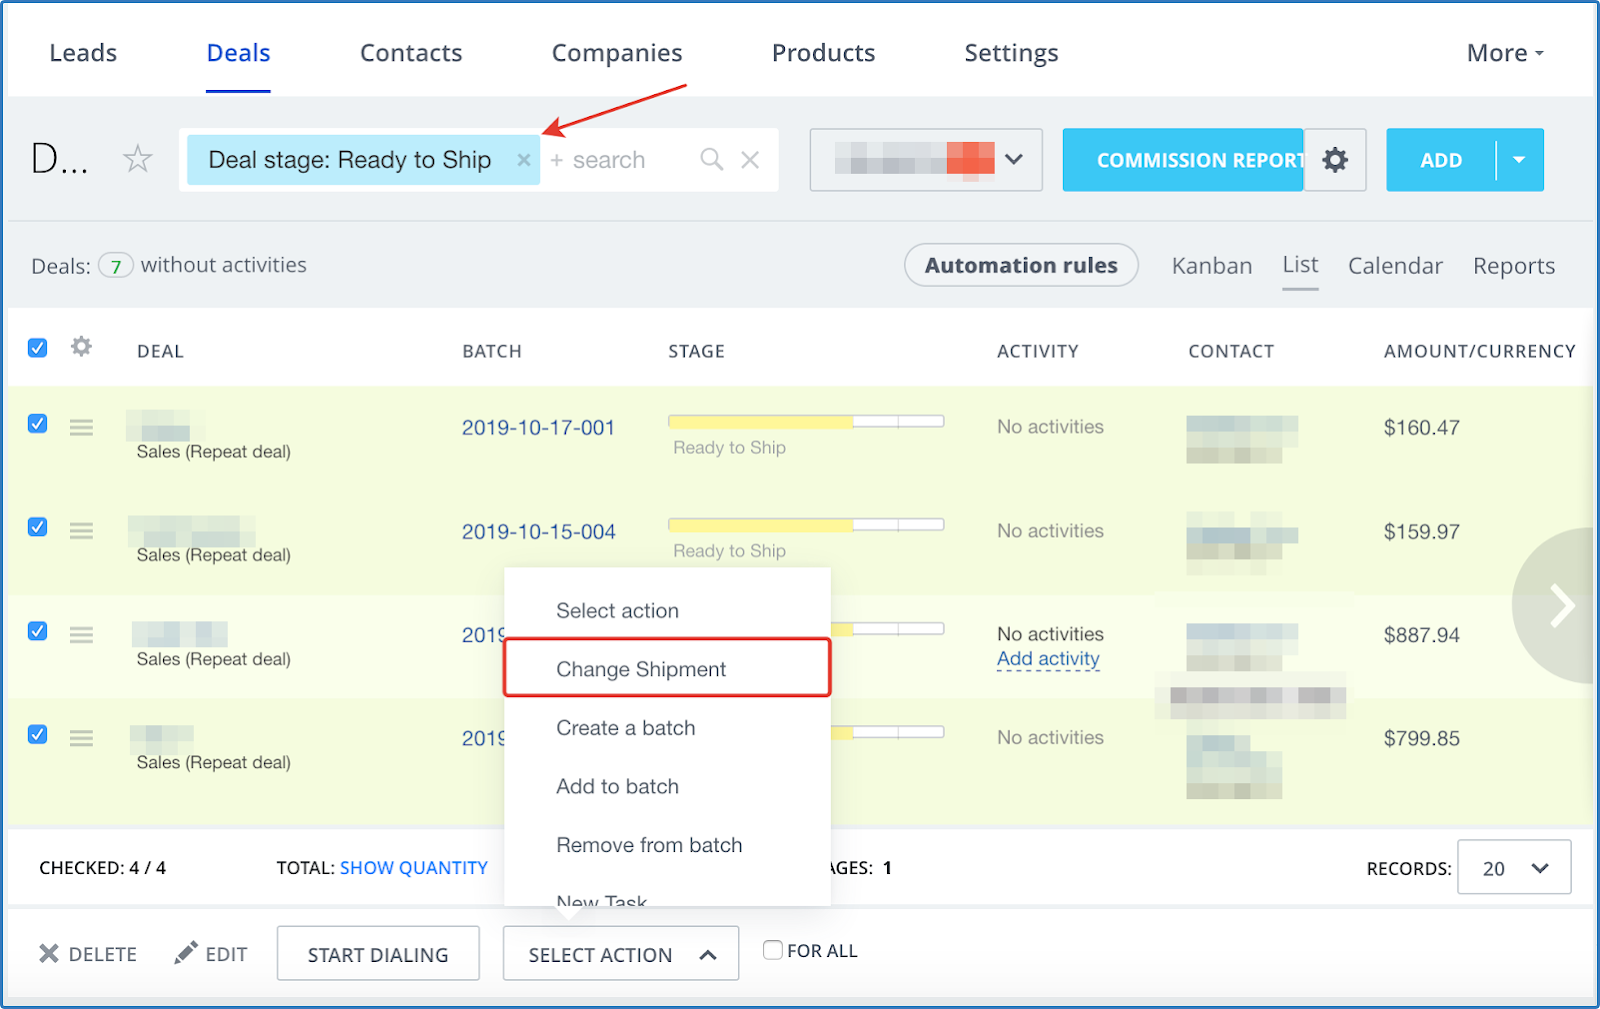
2. When the customer pays for the chosen products, the delivery manager can proceed with shipping. To get started, one selects the required number of deals and transfers them to the Ready to ship stage.

3. Then, one selects "Create a batch" in group actions.
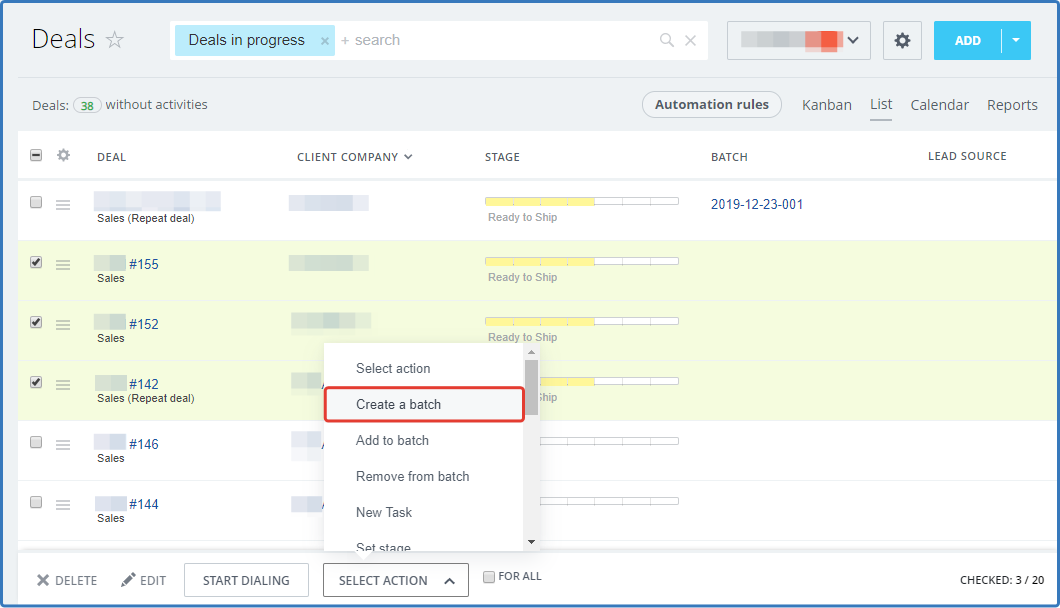
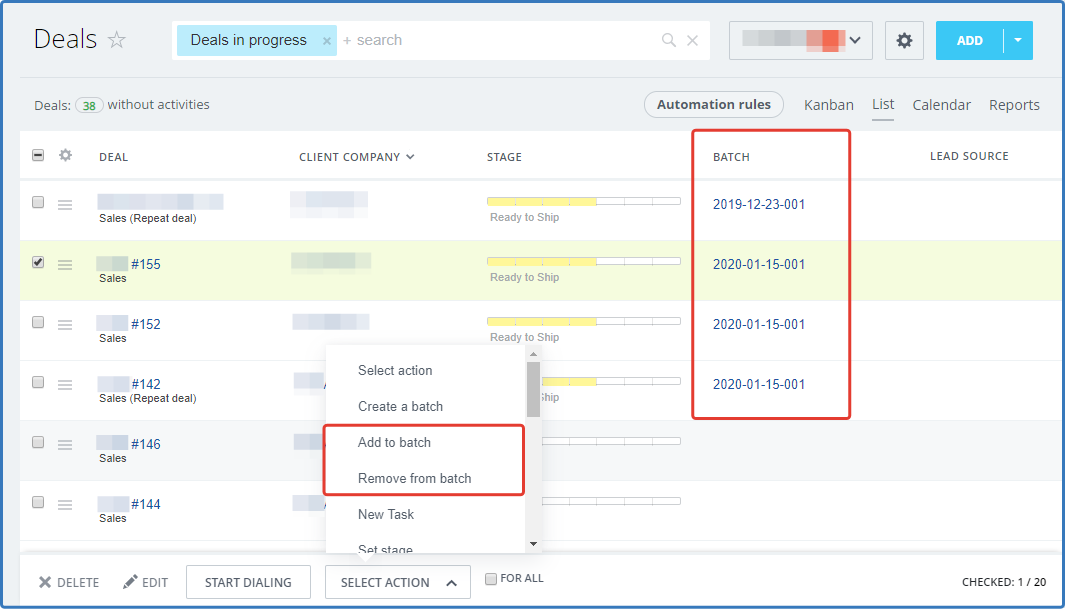
All deals combined in one batch are assigned with a unique number generated according to the scheme "year + month + day + serial number" (for example, 20200115001). The batch number is displayed in the Deal card and as a separate column in the general list of deals. All deals can be filtered by the batch number. Also, in the group actions one can add or remove a deal from an existing batch.
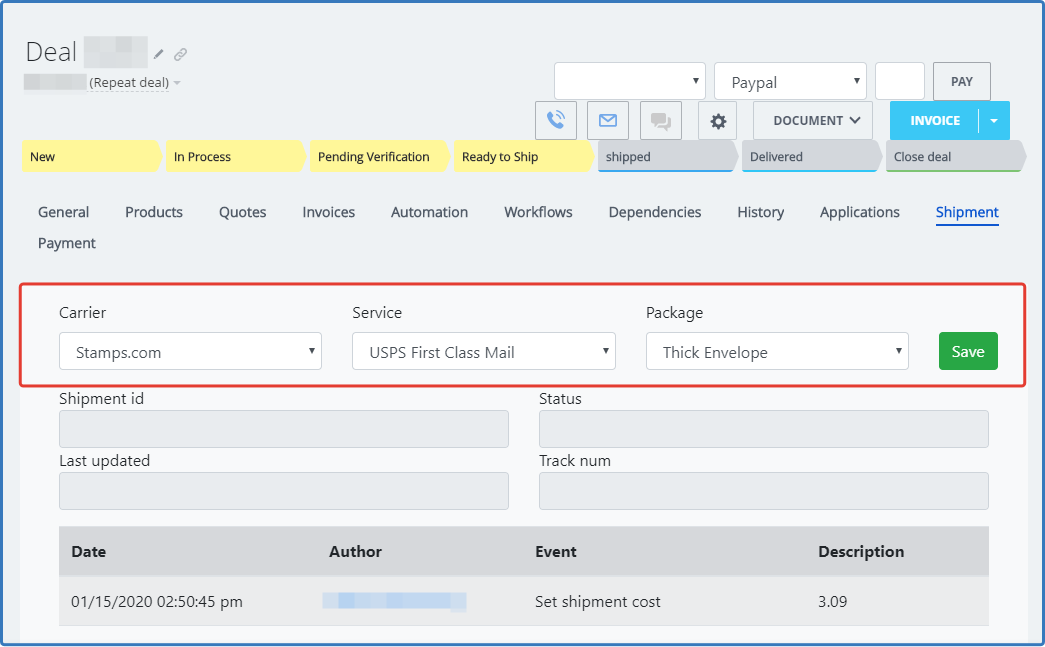
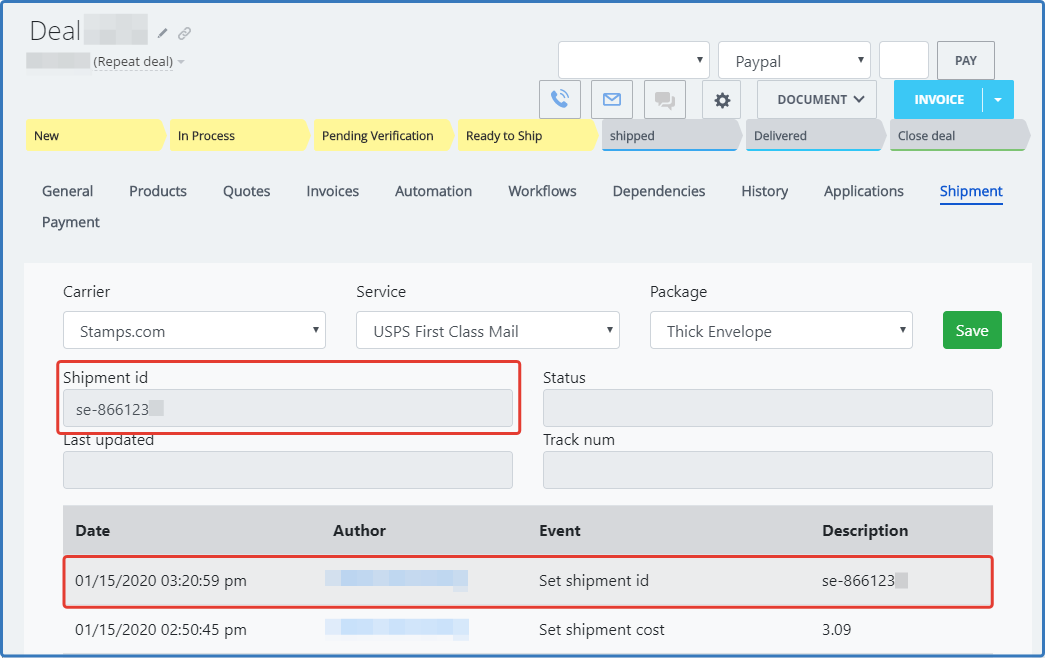
4. All actions made while forming a shipment are recorded on the Shipment tab in the Deal card.
If for some reason, the product does not get delivered and returns to the warehouse, an employee can remake the shipment by assigning the deal with a new batch number. All information about previous actions gets kept on the corresponding tab.

5. Next, one needs to calculate the cost of the delivery. After selecting the needed deals (one or several), the user proceeds to the group actions and selects Calculate shipping cost. The shipping cost is calculated based on the products weight. This characteristic is specified when adding products to Bitrix24 CRM. Thanks to the custom development, the weight of all products indicated in the Deal card is summed up automatically.
The system calculates the shipping cost and displays the result in a pop-up window. This data is stored on the Shipment tab of the Deal card.

6. Also, on the Shipment tab, one can manually set the conditions of upcoming shipping: set a carrier and a shipping service, select a package. When creating a Deal, these fields are filled in automatically based on the total weight of the products in the Deal card. For example, if the overall weight is less than 16 ounces, the system automatically selects carrier A, service B, and package C. If the overall weight exceeds 16 ounces, the parcel will be delivered by carrier D, service E, and in package F. As mentioned above, all these conditions can be changed, and one can manually set the desired values.
7. If one needs to change the shipping conditions for several deals at once, one can filter the deals that are in the Ready to ship stage and apply Change shipment in the group actions. In the pop-up window, the user can change the shipping conditions for all selected deals.
8. Now one can proceed to the actual shipment. The user selects the required number of deals from the general list and applies Make shipment in the group actions. As a result, each deal gets its id number valid in the ShipEngine system. Later, the system will create a shipping label based on this number.
9. To send a parcel, one must stick a special label on it. To create a label, the user selects one or more deals from the general list and applies Create shipping label in the group actions. Creating a label is a paid service, so one should proceed to this step only after thorough verification of all entered data regarding the address, quantity of products, and shipping cost.
The generated shipping label is automatically attached to the Deal card, and the info about shipping is recorded on the Shipment tab.
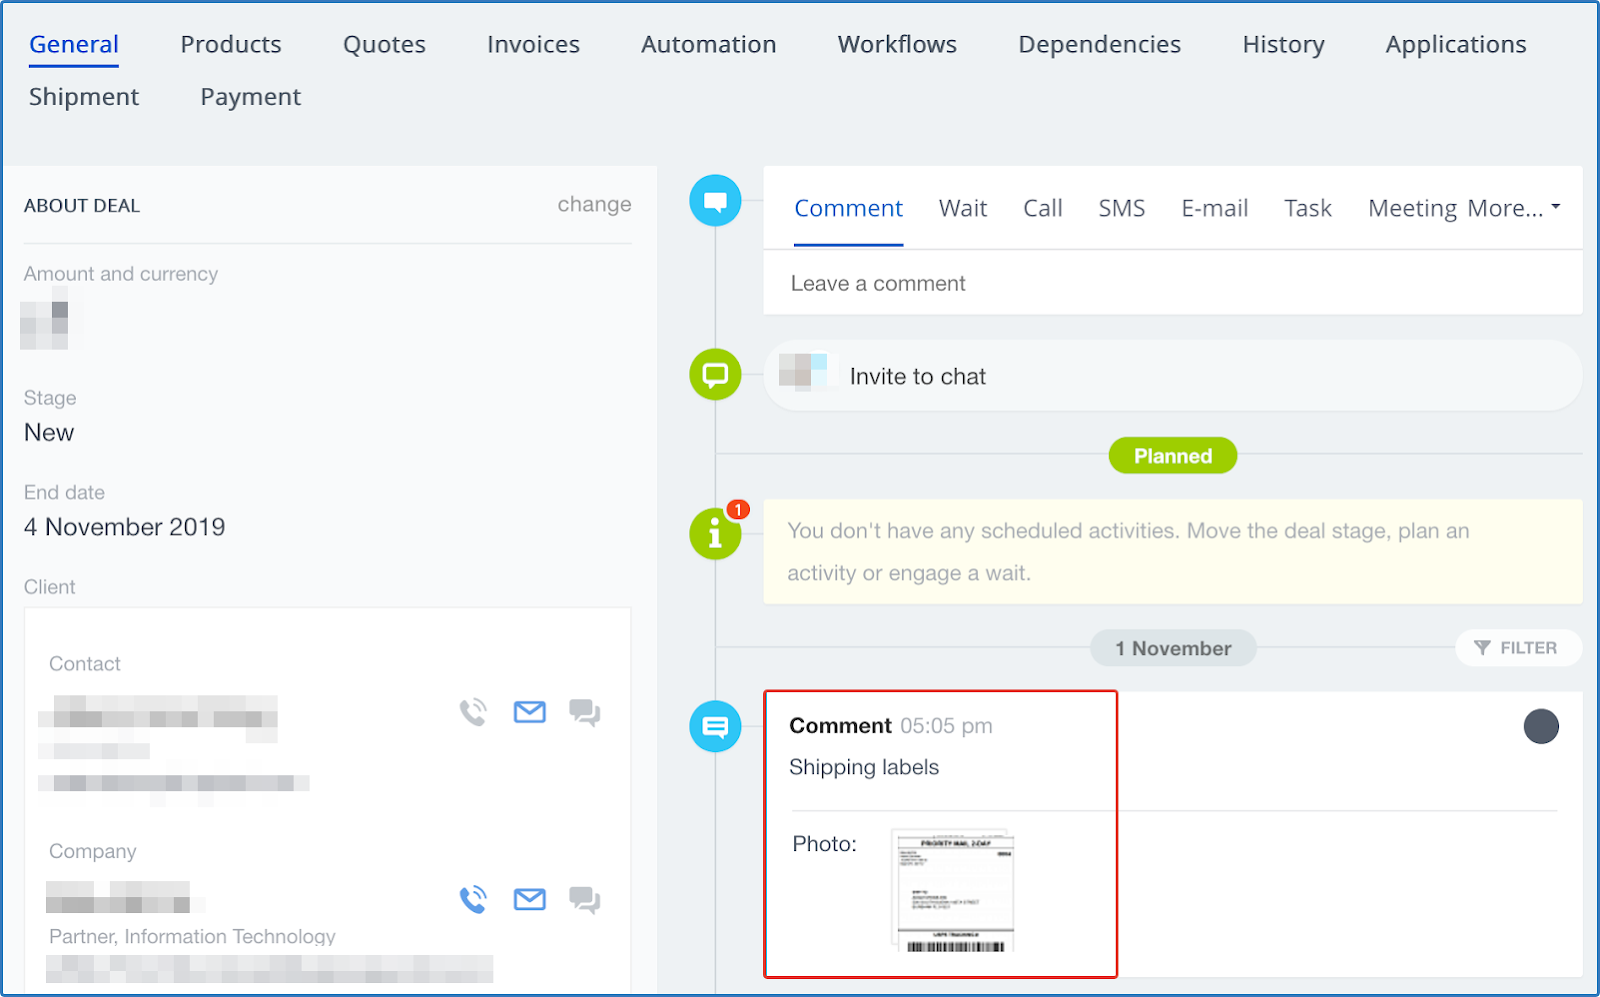
Now the manager can print the label, stick it on the parcel and hand the parcel to the courier.
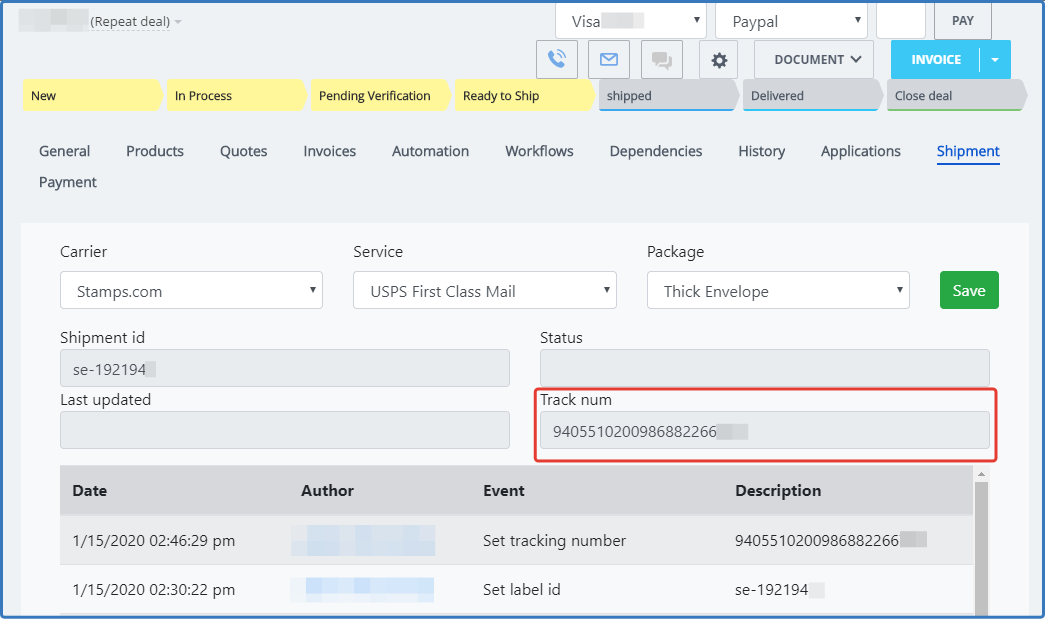
At this stage of the process, each deal is assigned with a tracking number that is displayed on the Shipment tab. The delivery status (for example, Pending delivery or Delivered) and the date of the update will appear there a bit later.
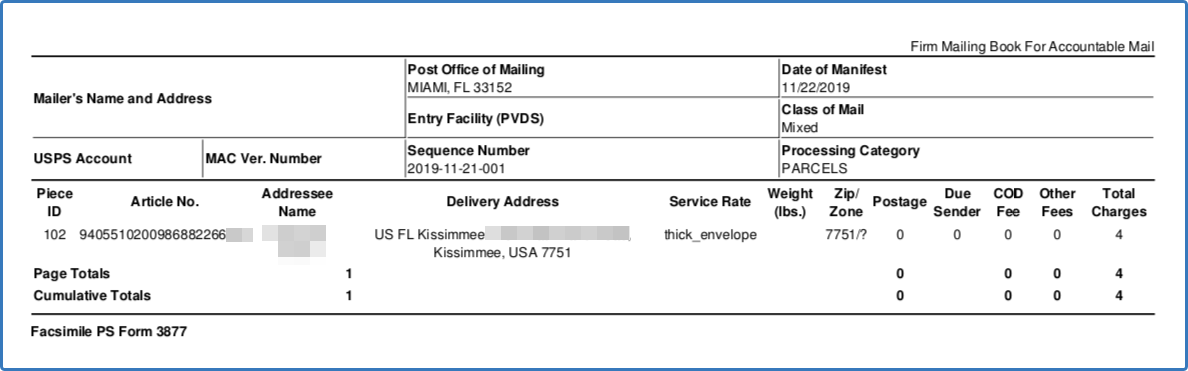
10. To complete the shipping, one needs to generate and print the shipping manifest. The user goes to the settings (the gear icon), selects Create shipping manifest, and specifies the shipment batch. The manifest will be automatically downloaded to the user's device in PDF.
11. When the package is delivered, the shipment status on the Shipment tab will change to Delivered. At this point, the manager transfers the Deal to the Delivered stage, and if it requires no additional actions, closes it.