If you are just thinking of installing the demo version of Bitrix24, have a look at the first part of the article where you will find some insights on how to get started.
First steps after the installation
Successful product implementation depends on what will be done immediately after the installation. Any new product, even the best one, is always met at dagger point — conservatives have a thousand reasons for sabotage. Unwillingness to change something, lack of understanding, laziness — all these factors put at risk any implementation.
We suggest starting with a simple step that takes no more than 5 minutes. To make your colleagues start associating the portal with your company, change the organization name in the portal header and set your logo.
To do this, go to Settings in the left side menu → Account Settings and enter the company name (general) and the company name in the logo that will be displayed in the upper left corner (it may be shorter).

To add the company logo, just scroll the page and upload an image in the given format.
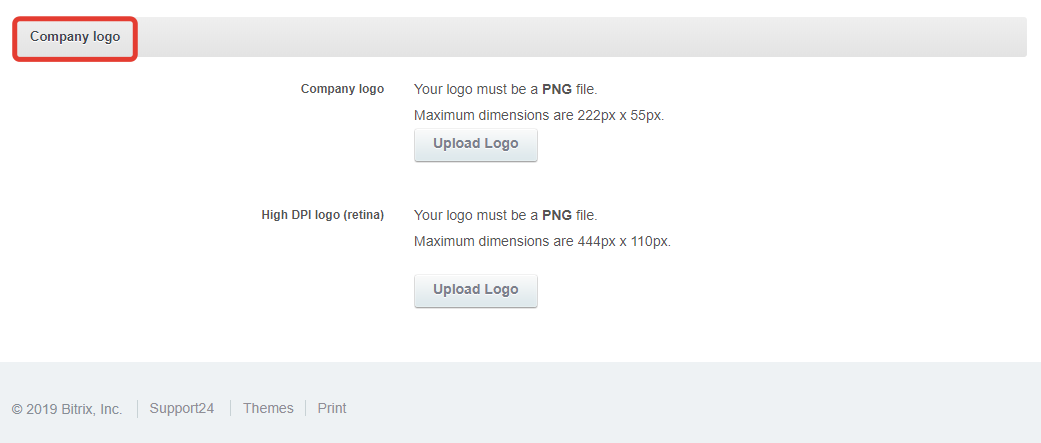
Note that if you specify both the company name and its logo, in the upper left corner of the portal you will see the uploaded image.
Свернуть
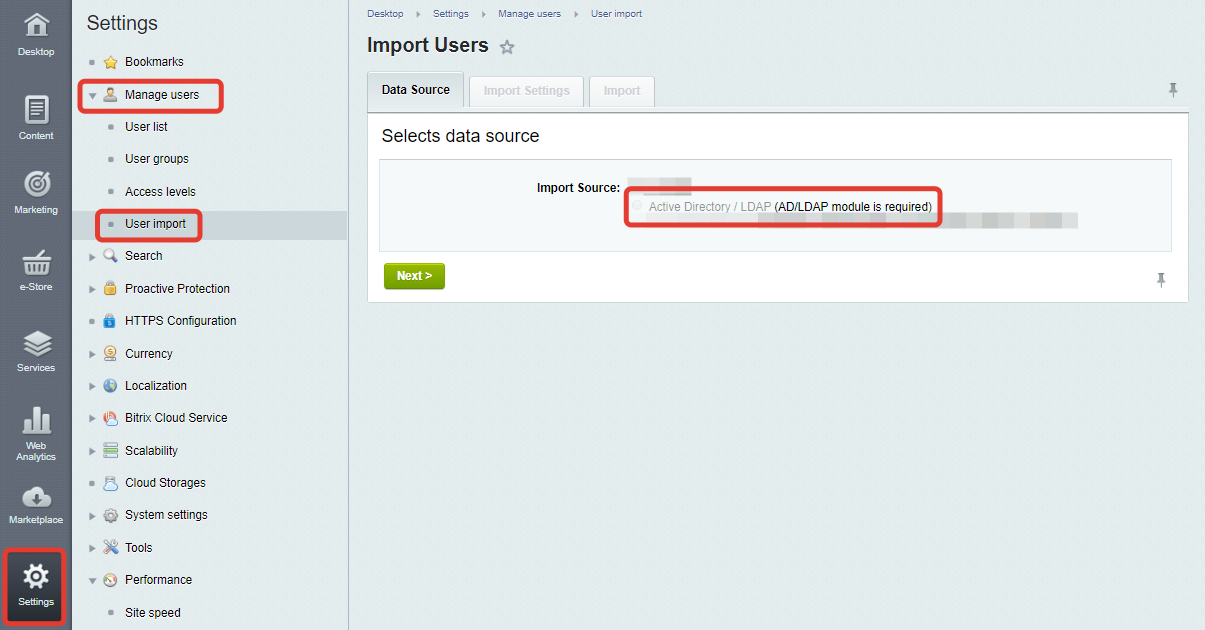
Further, we recommend to proceed with filling out the company's structure (i.e., to add employees and departments). To do this, you can integrate the portal with Active Directory, or you can do it manually.
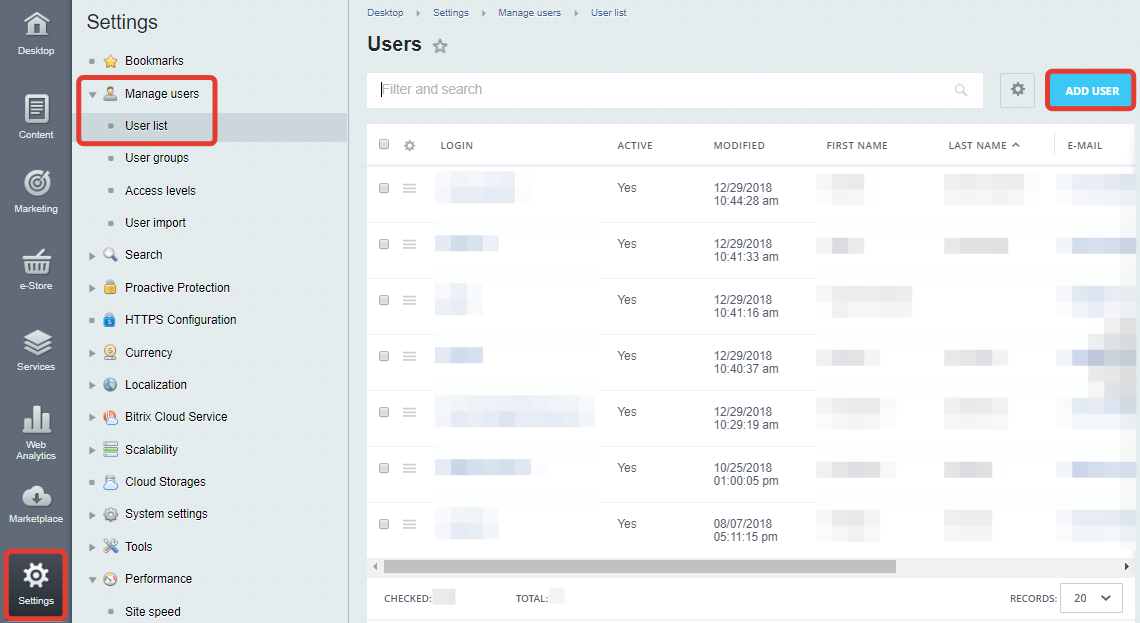
The first way to add employees is to do it manually through the Administrative Panel. Go to Settings → Manage users → User List and click Add user.
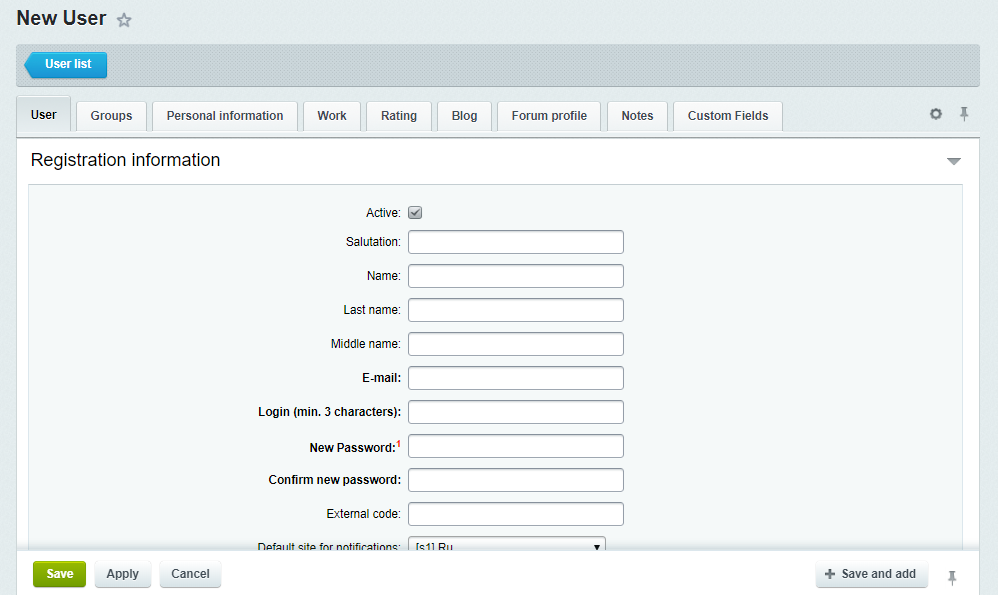
Next, you need to fill in the primary information about the user and click Save.
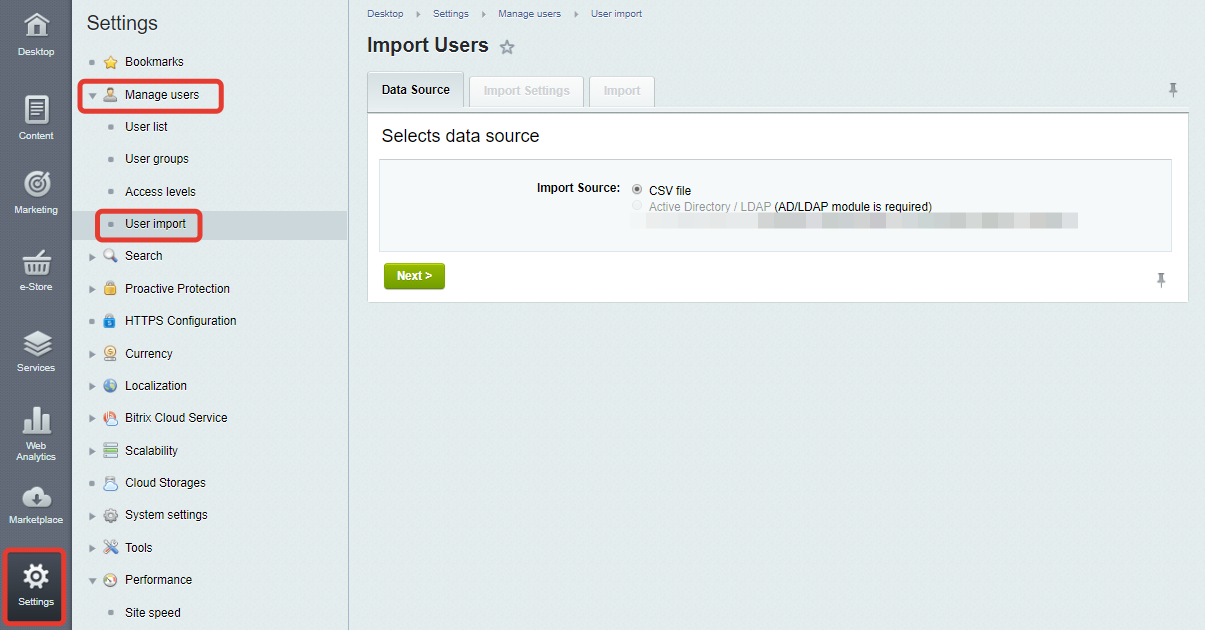
The second way to add users is to import them as a list in .csv format. The CSV file must be configured in advance.
The third option is to configure the integration with Active Directory. Most likely, at this point you will need some help coming from a partner who can set up the automatic data transfer.
After inviting employees, you can begin to create the company structure. Go to the Employees section in the left-side menu and click Add department. Here you can specify the department's name, create a parent one, and then go down, thus creating your company's structure. Each department can have subdivisions with unlimited nesting.

Свернуть
If you have installed the demo version of self-hosted Bitrix24 for 50 users, while your company has many more employees, don't worry — it's not going to be a problem to create a real company structure. A user is considered licensed if he was not only added to the portal but also entered it. In order to avoid problems with your demo-license, limit the pilot group to 50 employees for the trial period (30 days from the installation date). It means that you can add as many employees as you want, but there must be only 50 active users.
After filling the company structure you need to decide on business processes for which you will use the portal in the first place. To get the maximum benefit from the implementation in the shortest possible time, we recommend engaging a reliable partner who can determine which functionality is important for your particular company and launch it.
How to sell the idea to the executives
It often happens so that the initiative to implement Bitrix24 comes from the head of a small department or a working group, who clearly understands the value and benefits of this step. But to get financing he needs to present the project to the executives and defend its relevance to the company's needs. Below you will find several lifehacks on how to persuade the top-management and successfully implement the product.
To make sure everything goes smoothly, we recommend the following steps:
1. Show the portal with relevant company's data (build a structure, create a working group prototype, implement an illustrative business process). Of course, the product has value as it is, but it is much more effective to show how it aligns with the current processes and tasks of the company.
In addition to the obvious benefits of using the product, at this point, it may be useful to demonstrate and discuss the limitations that your company might face as part of the implementation process. It will help you avoid inflated expectations.
2. Show the practical benefits that the company will get as a result of the implementation of each particular tool. For example:
-
By implementing the portal for communications, we save 40% of the budget we spend on telephone communications and reduce the percentage of lost information in email correspondence. Conducting all internal correspondence via email, we lose a lot of letters in the growing conversation threads. But after we implement the portal, the work of the department will be systemized.
-
With the CRM implementation, the company's profit will grow by 25%. While processing clients in Excel, we do not take into account the interactions with them and do not see the big picture, resulting in a lost profit. According to market analysis and independent research, as a result of CRM implementation, a company's profit can grow by 20-30 %.
We hope that this article has helped you to gain some insights and systemize your knowledge on how to install the demo version of the self-hosted Bitrix24. If you have any questions left, or if you find yourself at the point when it is time to engage an integrator-partner, text us in chat, we are eager to help.