Many customers begin their acquaintance with Bitrix24 by installing its demo version. Then they usually stumble over a trifle and start wasting their time looking for a solution. Sometimes these attempts end in failure, therefore the customers might get a negative impression about the product even before getting to know it better. Surely, you can always order the service of Bitrix24 installation. But if you are sure you want to sort things out all by yourself you may find this article quite helpful and well-timed. For many years we've been collecting the common mistakes and now we're ready to share with you this guide that hopefully will help you escape falling into the same traps.
By reading this article, you will learn how to install the demo version of self-hosted Bitrix24 and make it a success as well as how to configure the product after its installation and check if everything was done correctly. For more, we will give you a few tips on how to implement the newly installed Bitrix24 to your company's routine so that the process should go swiftly and smoothly.
How to install Bitrix24 demo version
Step 1. Building the software environment
Bitrix24 works properly only in the Linux environment. The recommended operating system is CentOS 7. There you can quickly and easily install everything you need for Bitrix24 environment: Apache, MySQL, Nginx, etc. Don't worry if previously you worked only in Windows. There are ready-made BitrixVM images that contain everything you need. They adapt to the resources allocated to the machine. The only thing you need to do is to check the disk space in the system.
We advise installing Bitrix24 demo so that you could use it in the future when you are ready to put the product into service. Most probably, this advice does not apply to high-load installations (for more than 1000 portal users), but it should work fine for a relatively small company (up to 100 users). The thing is that during the testing process users often start using the product to its full extent and accumulate information in the system. Thus, if you want to move it to another server, at the very least you will need to restore it from a backup copy (due to the complexity of execution we will not discuss here the cases when you need to transfer the information of only one type — for example, users and their chat messages). However, the work of an application such as Bitrix24 depends on a huge number of environmental parameters. You can spend a lot of time identifying the differences between two machines, one of which works fine and the other, due to the lack of knowledge on the configuration of a particular component, does not. It's much easier to put Bitrix24 into operation right after the testing period by entering a license key if you already have a stable environment. By the way, you can do it even after the demo version expiration date.
BitrixVM ready-made images are available for such virtualization systems as VMWare, HyperV, OVA, and VirtualBox. Following these links, you can download the latest version of virtual machine BitrixVM 7.3.0. Please note that in each image the disk space is 20 Gb. It's quite enough for a test run but we recommend expanding it up to 100 Gb for full-scale exploitation.
If you decide to install a self-hosted Bitrix24 on a physical server, you should install CentOS 7 and then download and run from the command line the Bitrix24 installation script — a wizard that simplifies the installation of the necessary environment.
Heads up: we do not recommend installing Bitrix24 on a shared-hosting as well as using hosting providers that do not guarantee resource allocation. Quite soon you may encounter some problems with the performance, and thus you may need to reinstall the system but this time on dedicated server. As for the hardware requirements the vendor recommends the following:
1. For systems with low load (up to 50 users):
-
2 GHz 32-bit (x86) or 64-bit (x64) processor, or faster;
-
8 GB RAM (32-bit or 64-bit), or more;
-
500 GB of available hard drive space or more.
2. For systems with medium load (50-500 users):
-
4 GHz 32-bit (x86) or 64-bit (x64) processor, or faster;
-
64 GB RAM (32-bit or 64-bit), or more;
-
2 TB of available hard drive space or more.
3. For systems with high load (over 500 users):
-
4 GHz 32-bit (x86) or 64-bit (x64) processor, or faster;
-
256 GB RAM (32-bit or 64-bit), or more;
-
5 TB of available hard drive space or more.
For high-load systems, as well as to ensure the resiliency of the system, it is recommended to create a cluster based on the 1C-Bitrix24: Enterprise.
Step 2. Installation
When the environment is ready, you can proceed and install your on-premise demo version of Bitrix24.
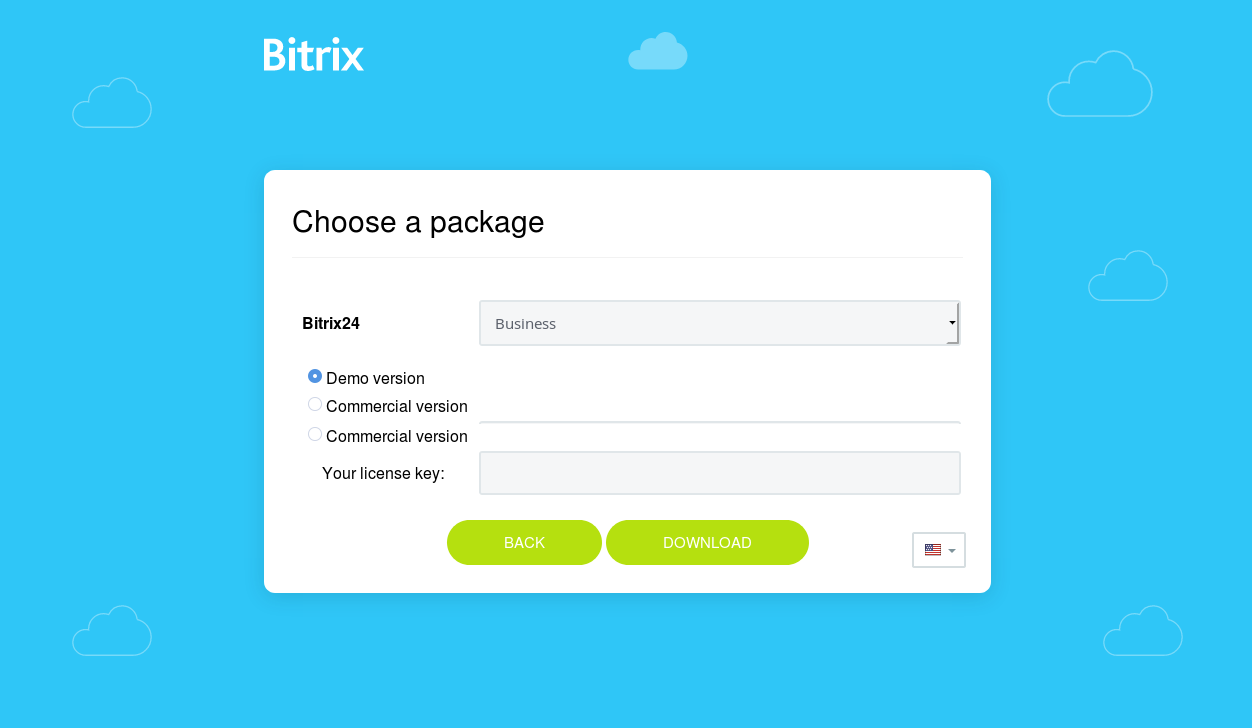
Open a browser and insert in the URL bar the address of your virtual machine (for example, http://192.168.0.1). Follow the link, and it should open the Bitrix24 installation wizard. You will need to select a product (Business or Enterprise) and follow the steps to complete the installation. If anything goes wrong, you can download the Bitrix24 installation wizard (bitrixsetup.php file) at any time and proceed as follows: place it in the root directory of the web server and enter the path to it in the browser address bar (in our example it is http://192.168.0.1/bitrixsetup.php).
During the installation process, the wizard will ask you to indicate the database name, as well as MySQL user name and its password. If you have just deployed the downloaded image of the virtual machine, you do not need to create a database and a user. The system will do it for you. In this case, you can skip this step and just click Next.
The installation process takes a few minutes only. In the end, you will need to set the administrator's login and password to enter the system afterward.
How to configure Bitrix24 after installation
Despite the fact that each Bitrix24 installation is unique and has its own specific aspects, there are some actions that are common for everybody. Thus, if you want to work with the mobile app and the Open Lines functionality, as well as to have access to the portal outside the local network, proceed with the following settings:
-
allocate a domain name for Bitrix24 and indicate it for the web server;
-
install an SSL certificate issued for this name into the system;
-
provide outside access to the machine via port 443 (to access the web server via HTTPS);
-
provide outside access via tcp port 8894 (to deliver PUSH messages via web sockets; it's required for the messenger to work correctly).
Even if you expect to use Bitrix24 in your local network only, the machine where you are installing it should have access to the Internet (to install updates on a regular basis). Also, we strongly advise that you follow the instructions given in the paragraph above at least for the installation and testing period. It's the only way to use the built-in testing tools to the full extent and involve external experts, if necessary.
You need an installed valid SSL certificate to install an application from Bitrix24 Marketplace, as well as to work with telephony and to use a secure connection for integrations with external systems (website, ERP, etc.). You can purchase an SSL certificate in a certificate authority or get it for free using Let's Encrypt service. But bear in mind that you cannot use a self-signed certificate since it's verified at external nodes of the network. Also, you should keep in mind that all certificates have expiration dates and they should be renewed 20-30 days before they expire. In fact, renewing the certificate means issuing it and installing in the system.
If you expect to use Bitrix24 telephony service you should be very careful with the network configurations. We decided to skip this part in the article but you can find more detailed info in the manual.
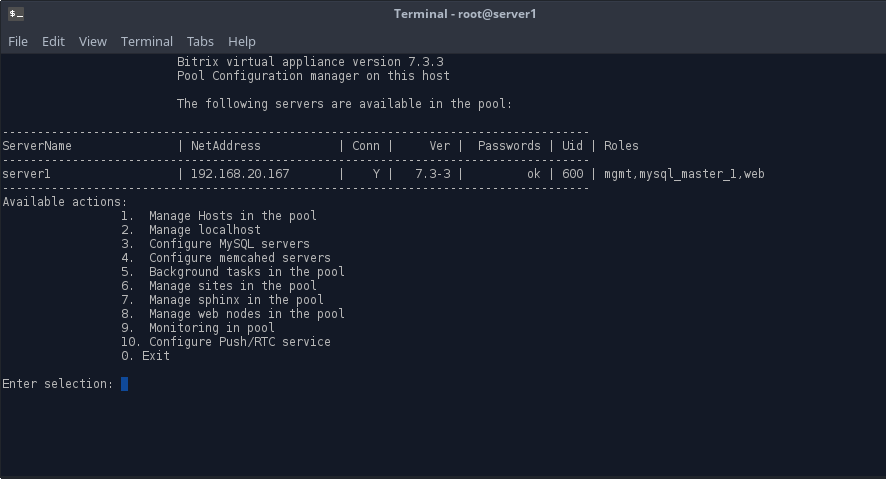
To facilitate the process of changing the environment settings of BitrixVM and BitrixEnv there's a convenient menu that is launched automatically right after authorization via SSH.
How to check if Bitrix24 works correctly
To check the correctness of settings and of the built environment you can use a testing tool that is available in each self-hosted Bitrix24. To get started go to the administration panel and select Settings → Tools → System check.
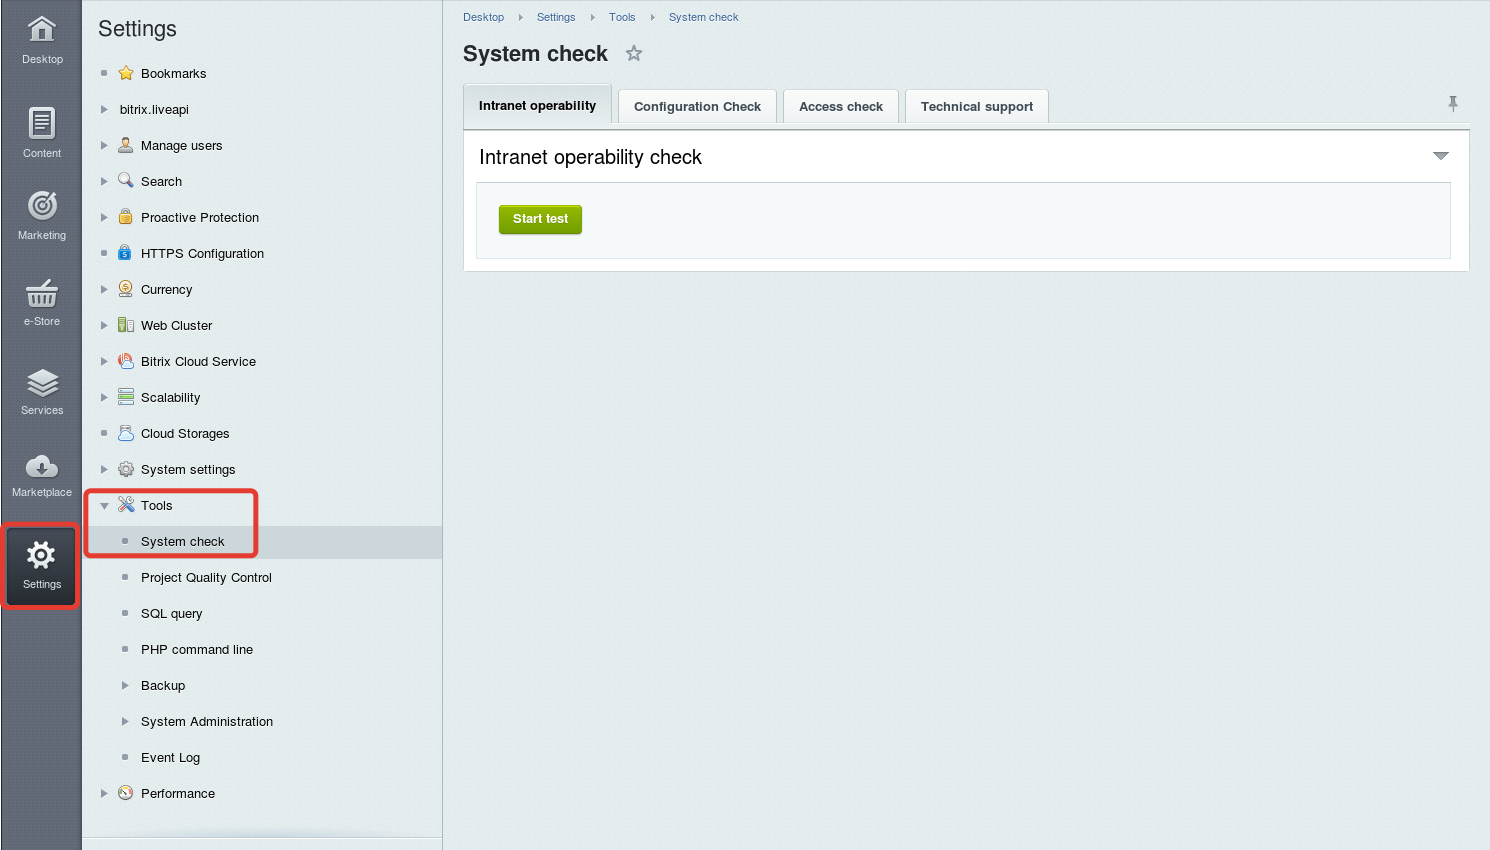
Two main tabs are Intranet operability check and Configuration Check. While testing the configuration, the system checks the main environment characteristics and the errors are marked in red. Next to each item you can see the info on which characteristics are being checked at the moment and in case of errors there are recommendations on how to eliminate them.
The Intranet operability test consists of a series of automated tests divided by functional blocks. Here you can check not only the environment settings but also the settings of the Bitrix24 modules which are responsible for certain functionalities. Similarly to the configuration check, next to each item with found errors there will be recommendations on how to eliminate it.
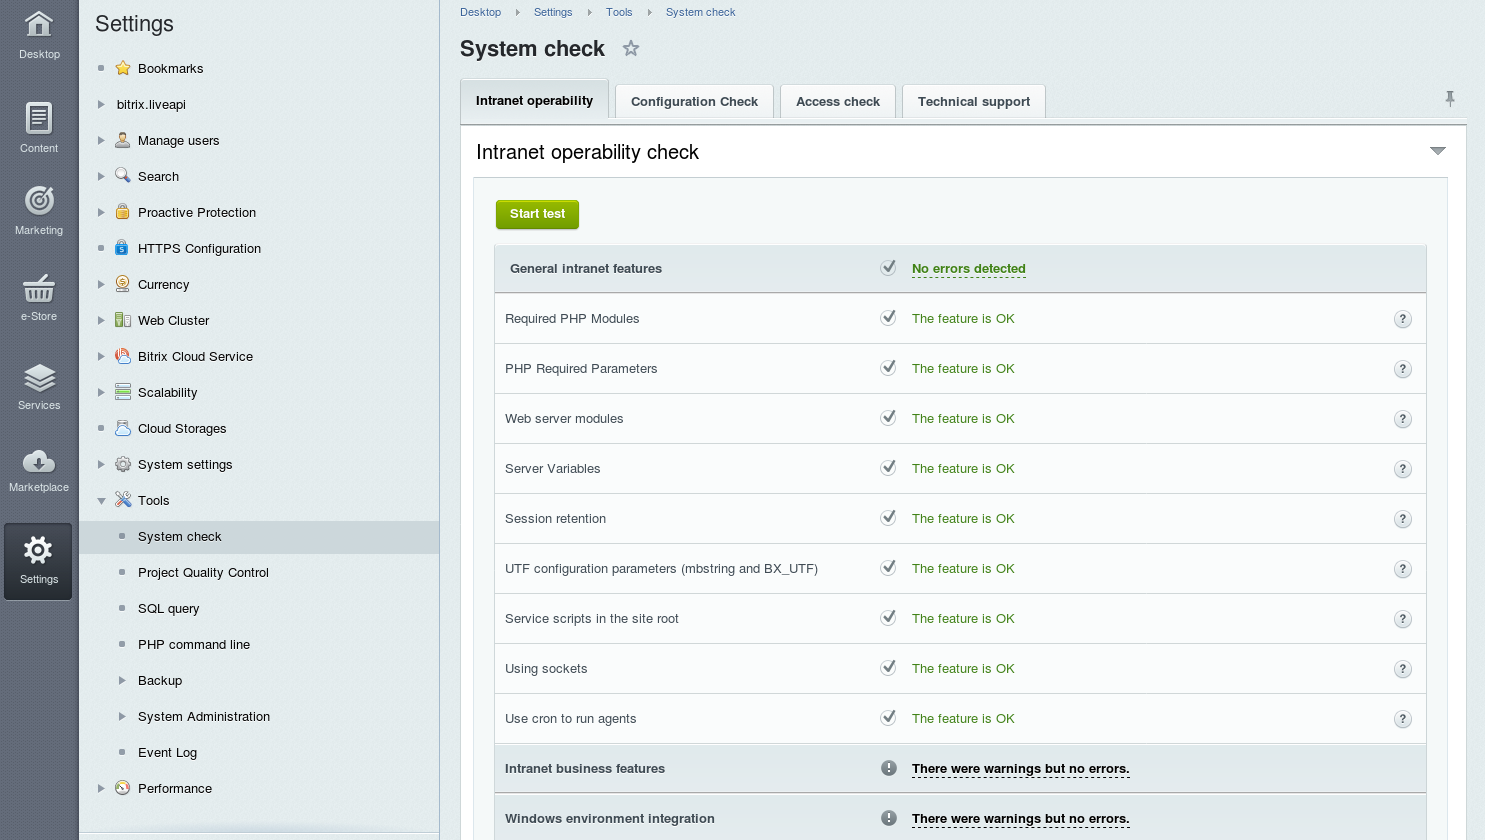
We recommend making sure both tests result with no errors as it's the minimum guarantee that in the future you will not encounter problems with the standard functionality.
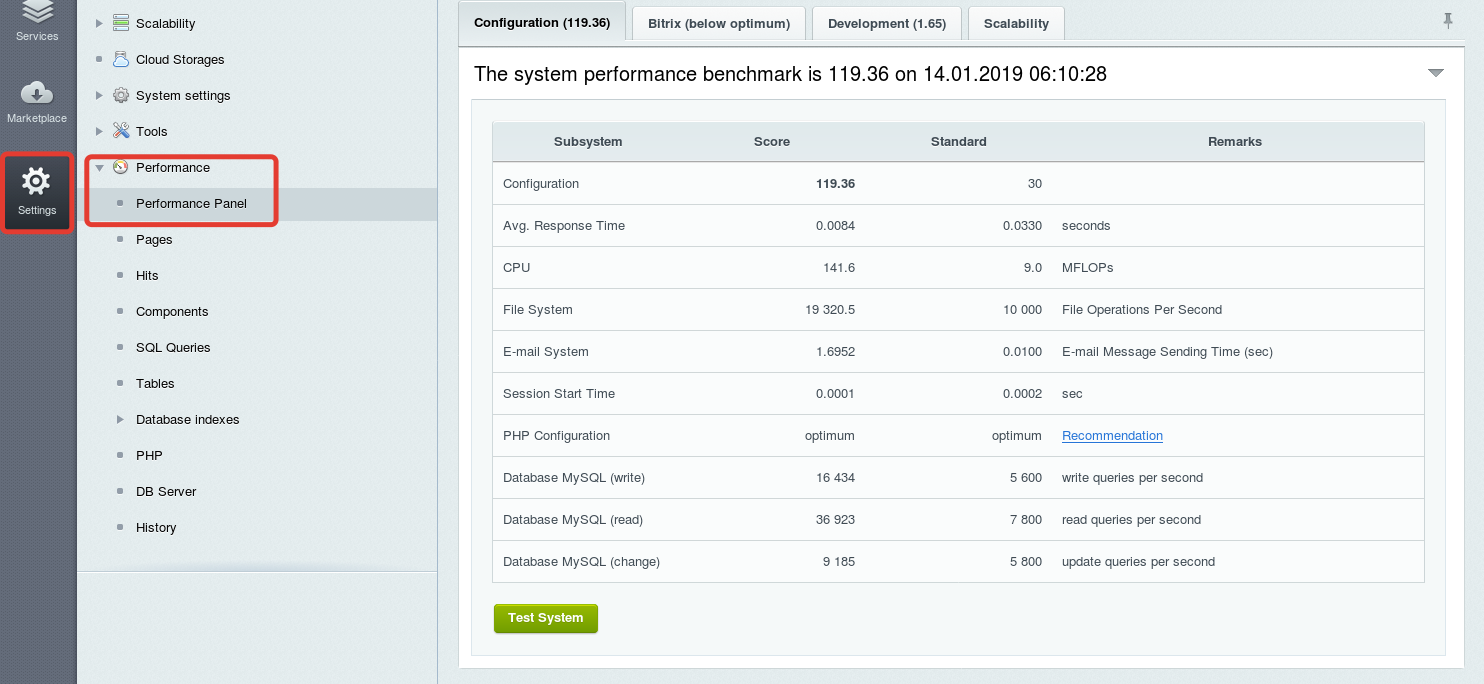
Also, it's worth mentioning one more tool which is the performance check wizard. Go to the administrative panel and select Settings → Performance → Performance panel. This test gives the average weighted performance scores in arbitrary units. By performing various operations, it compares the time spent on its execution with the standard of comparison and returns results. In case of low performance results without any load on the system, it makes sense to think of how to add resource usage.
To be continued
In this part of the article, we have covered all the details of the self-hosted Bitrix24 installation process. But the installation is just the first step in adopting the product. In the second part of the article, we will share a number of tips that will help you speed up and facilitate the implementation process and soften the resistance of company's conservatives.
If you have read this text up till the end, here's your bonus: with buying the license you get a free service provided by our experts on installation and basic configuration of Bitrix24. You can choose the plan that meets your needs here.