Who can benefit from this article?
This piece is for those who already use Asterisk telephony and want to partially or completely switch from the standard phone.
What is it about?
Down below, we'll cover what a softphone is, what advantages it has over a conventional SIP device, and what data is needed to configure it for Asterisk.
What a softphone is?
A softphone is a computer dialer, an application that one can install on any device to communicate via the Internet. Outwardly, the softphone is similar to Skype or WhatsApp, but unlike the latter, the softphone gets connected to a virtual PBX and allows calling all mobile and landline numbers, including those that are connected to IP-telephony, at the selected rate.
All softphones work following the Click-to-Call principle, i.e. one dials a number on the keyboard of their device, and the software connects the addresser with an addressee.
What's the point?
First of all, the softphone acts like a standard office phone: one can make, receive, and forward calls.
Second, the softphone gives mobility: take a device with installed softphone with you, and you can make and receive calls at the same price as at home, wherever you are. So, if you go on a business trip abroad, you will be constantly in touch with your customers and partners.
And finally, the softphone does not require purchasing any additional equipment: all you need is a smartphone or a laptop/PC. One can set up communication among office departments or connect remote employees without unnecessary effort and additional costs.
How to install and configure a softphone?
What data will you need?
To configure a softphone, you will need the following data:
-
server address;
-
port address;
-
extension;
-
password (secret).
This data can be delivered in two forms:
Server: 111.111.11.111
Port: 5060
Extension: 2002
Secret: 123456789
or
URI 2002@111.111.11.111:5060
Secret: 123456789
Different softphones require different forms of data presentation. Below we will get back to this issue and show how to enter data on real examples.
Where is the data stored?
If you use a virtual PBX, getting the needed data will not be a problem — just contact your provider and ask for it.
In this article, we will discuss how one can get this info on the FreePBX example.
The server address is the address of your FreePBX. You can find your port address going to the FreePBX administrative panel → Settings tab → Asterisk SIP Settings.
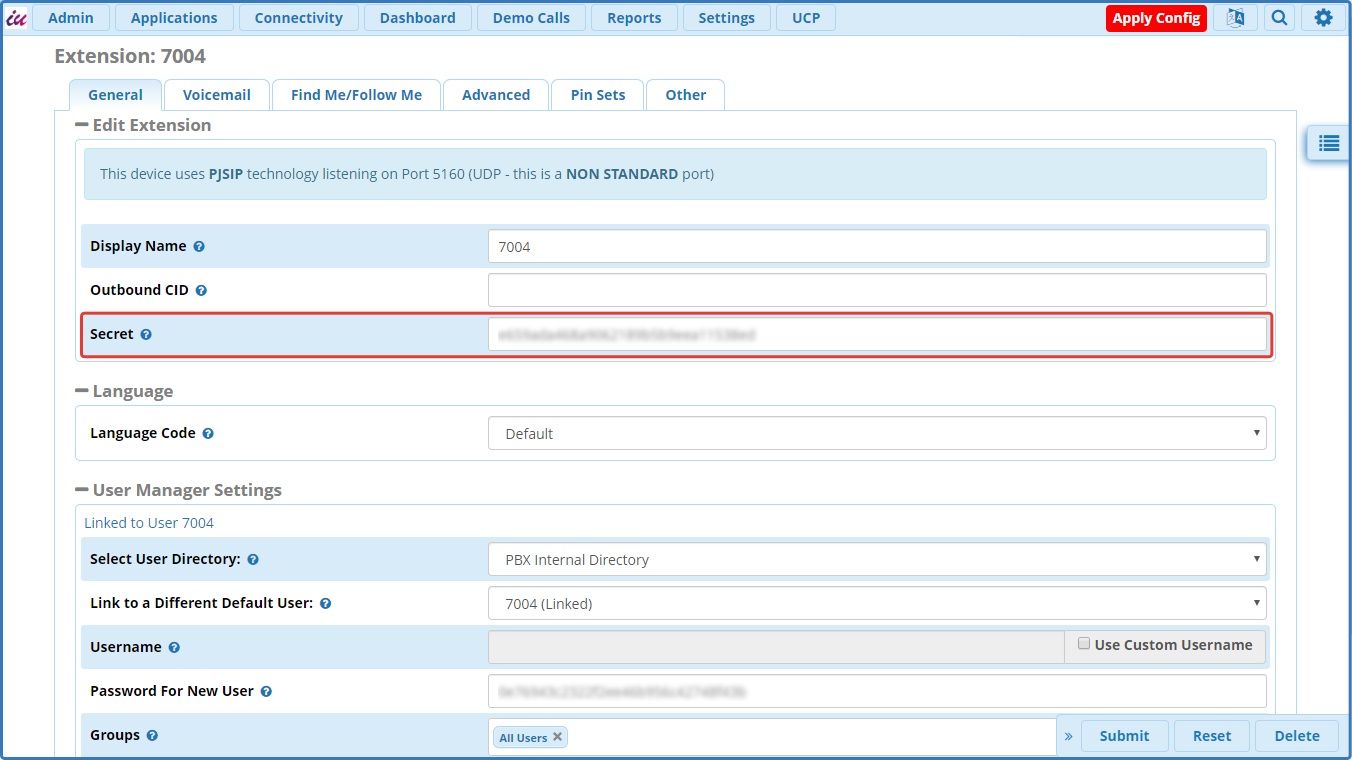
To get the password (Secret), go to Applications → Extensions. Create or select an extension that you would like to connect to the softphone. Click on the extension, and copy your password.
How to install a softphone?
Most softphones have free versions that are compatible with major operating systems. All you need to do is go to their website, download an installer, and run it on your device.
Below you can see how to create an account for two popular softphones: MicroSIP and Zoiper.
How to connect a softphone to a PBX?
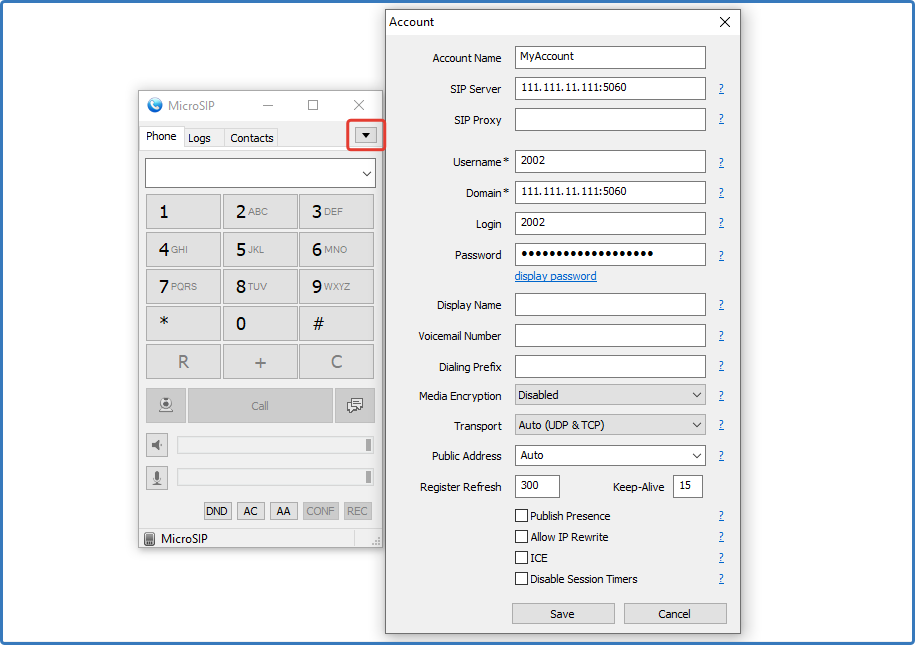
Run the installed software. To get started, you need to create a new account. In the example on the screenshot below, you can see an arrow marked with red. Click it and select Add account from a drop-down list.
Next, enter the data indicated above, as follows:
Account Name — any name of your choice
SIP Server — FreePBX server name and port (Server:Port)
Username — extension number
Domain — FreePBX server name and port (Server:Port)
Login — extension number
Password — password (Secret)
After saving the settings, you can go ahead and start making calls.
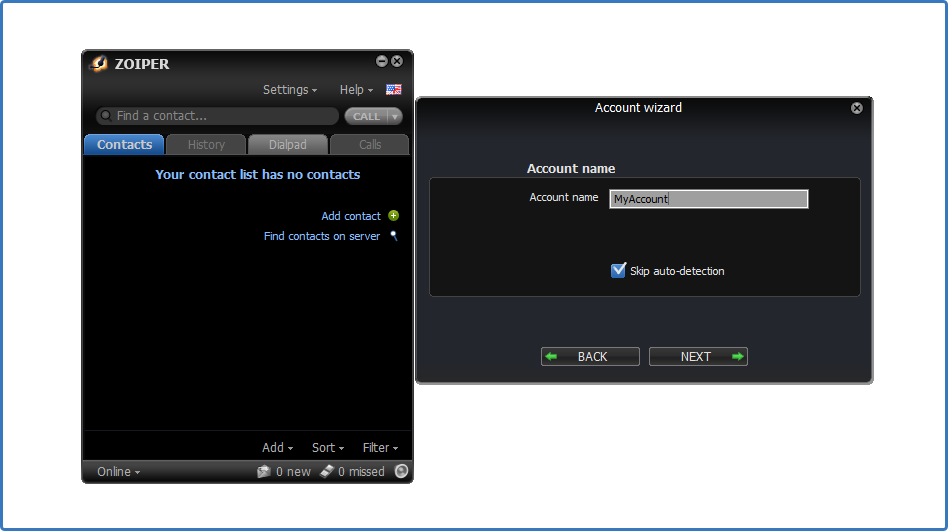
Another software might require a different format of entering data, for example:
user / user@host — URI (Extension@Server:Port)
Password — password (Secret)
Domain / Outbound proxy — leave this field empty
Account name — any name of your choice

Step 1

Step 2
Step 3
The only thing that you're left to do is to import your contacts, and you can start making calls.
That's all you need to know about the basic configuration of any softphone. The rest depends on the selected software and the intended format of work.
If you already use our Bitrix24 and Asterisk integration, check out our extension for Chrome — Softphone24. With it, you can make and accept calls even if the tab with Bitrix24 is closed. To help you through the configuration process, we have gathered a guide with all the steps.